![]()
|
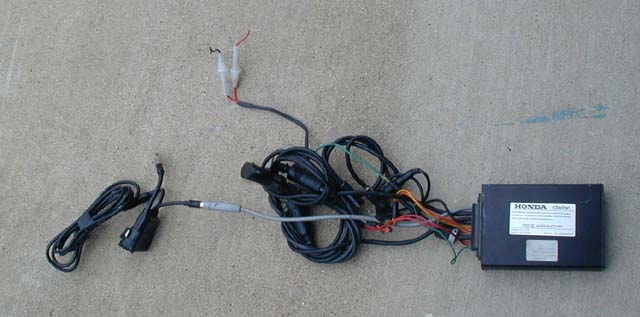
Honda/Clarion CB/Intercom/Aux Audio This unit was originally built by Honda as an option for the Valkerie cruiser. It works so well that it's become very popular for a lot of riders looking for an integrated sollution. The problem is that Honda discontinued it about a year ago for some unknown reason. The best we can guess is because of the advent of the GL1800, the subcontracts for GL1500-based products like this (it uses the same modules as the GL1500 units but without the AM/FM/Cassette tape module) were targeted and phased out. It has two major components:
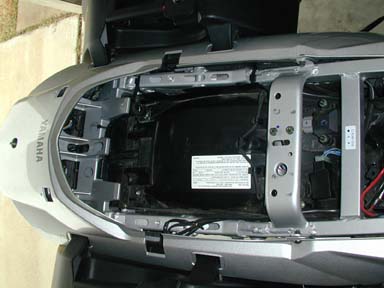
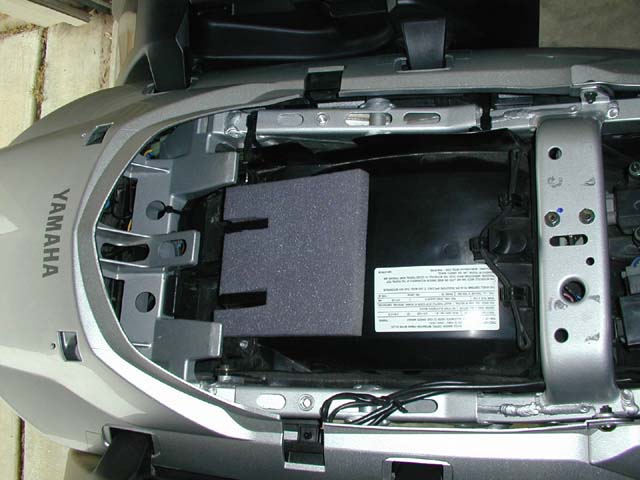
It provides a CB and a rider-passenger intercom while also including an input jack for auxiliary audio that you can use to feed a tape, radio, XM Radio, or (as I will do) an MP3 player. Anything that uses a mini headphone jack will work. The best place to install the main module was under the passenger seat.
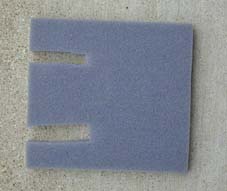
I first cut some closed cell foam to fit around the ridges on the fender liner to fill the gaps and for whatever slight support and shock control it might provide.
I used some aerosol adhesive on the foam to hold it to the curve of the fender when placing it.
Next I slid the main module underneath the seat support tabs, ran the wires, and re-installed the OEM rack. There wasn't a need to secure the module because the press fit, the clearances to each side, and the rack all worked together to constrain movement.
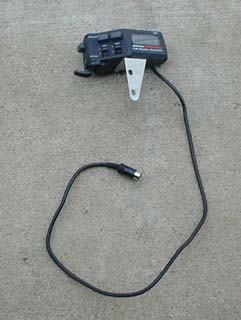
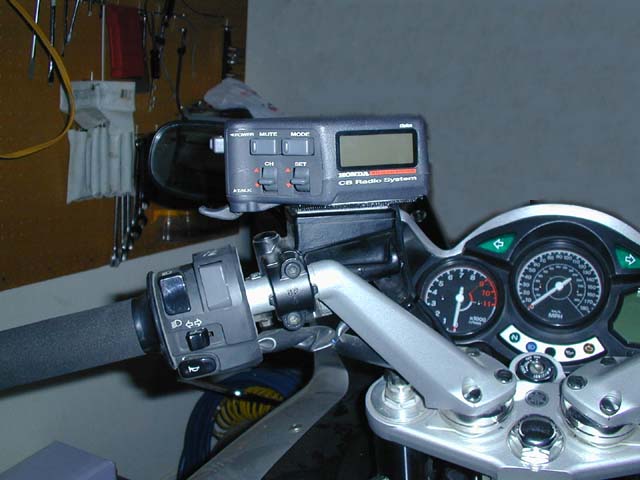
Lastly, I mounted the control head to the clutch reservoir using industrial Velcro from Radio Shack. I then routed the control head snake under the tank and back to the main module.
I had to use an extension cable from Sierra Electronics because the OEM wiring wasn't long enough. I also used on of their straight mounting brackets to mount the antenna to the rear luggage rack. It had to be cut shorter and the elongated holes had to be lengthened. Because it's made of stainless steel, I got a friend to make the changes with his plasma cutter. I then U-Bolted it to the rear rack.
I had to make some "shims" to wrap around the rear rack where the u-bolts clamped against it. The rack is made of plastic and, after a while, the u-bolts started cutting through the plastic. I first wrapped the rack in scraps cut from an old mouse mat, wrapped that in pieces of tin (home supply shops have sheets of the stuff), and the mounted the bracket using the u-bolts. Over the past year, since I made the change, no additional wear has occurred to the rack.
All material on this site (c) 1995 - Present, Mark Johnson. All rights reserved. |