2008
Subaru WRX STi
Valentine 1
Radar Locator
Hard Wired Installation
I wanted to move away
from the suction cup bracket on the windshield but the visor bracket had the
V1 either too close to me (when on the driver's side visor) or too far away
(when on the passenger side visor).
Here's one method of
mounting the V1 that uses the factory hard wire kit and a slightly-modified
visor bracket.
You'll need the following
tools:
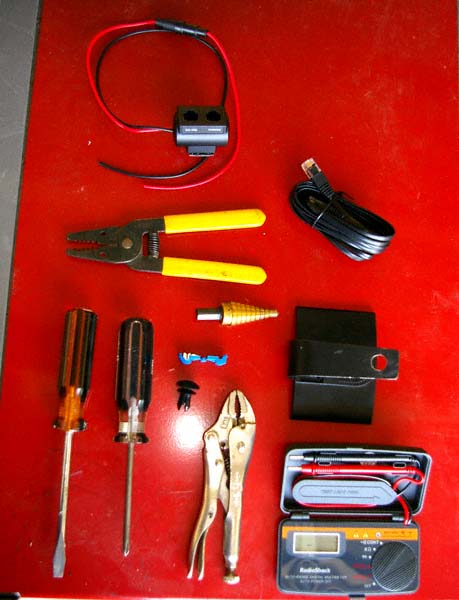
Clockwise from the
lower right: Volt meter, Vise Grips, Subaru plastic head liner rivet, V1 (blue)
"vampire tap", Philips head screw driver, Flat blade screw driver,
Uni-Bit (gold) , Wire strippers, V1 hard wire socket, V1 data cable, 2 Posi-Taps
(not shown)
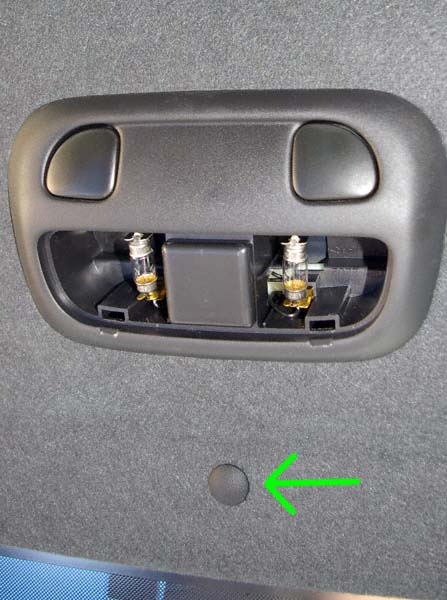
Using the flat blade
screw driver gently remove the map light lens from the map light assembly.

Using your finger nails,
gently lift up on the head liner plastic rivet (arrow). The rivet head will
lift up about a quarter of an inch from the body unlocking the rivet which can
then be removed.
Using the Philips head
screw driver, remove the 2 retaining screws from the map light assembly.
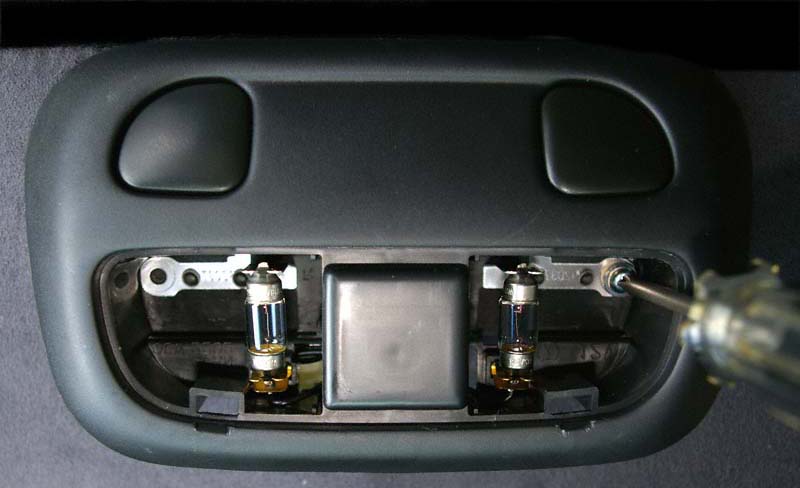
and lower the light
assembly to reveal the wiring harness (large white connector). Disconnect the
light assembly and set it aside.
Using the V1 visor bracket
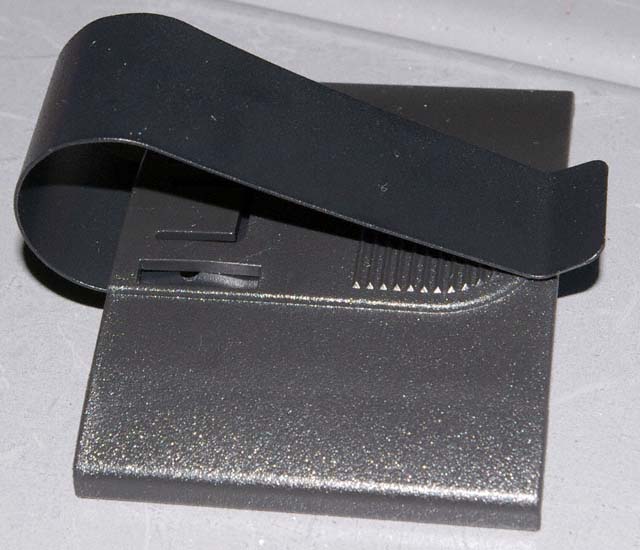
Straighten the metal
clip
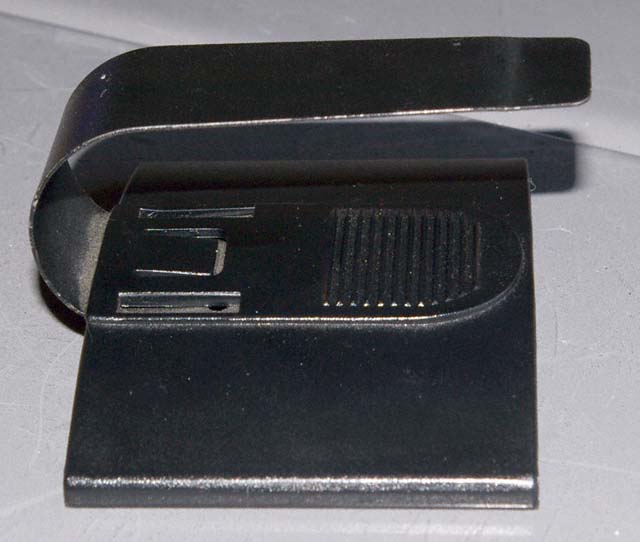
Using the Uni-Bit, drill
a hole in the upper portion of the metal clip. Hold the clip with the vise grips
because the bit can grab it and send it slicing through your hand if you don't.
The hole should be large enough for the Subaru head liner plastic rivet to pass
through during reassembly. The hole can be seen in the first photo at the top
of this page.
Throw away the blue
"vampire tap" that came with the V1 hard wire kit. These slice through
the insulation and can indiscriminately slice strands of wire leading to failures
from corrosion and metal fatigue. I recommend Posi-Taps.
These are designed to create a secure connection without creating the potential
failures from vampire taps. For this application, you'll need 2 PTA2022 Red/Grey
taps.
Unswitched Power
(Always On): To reduce the risk of strain from tapping too close to
the connector, I carefully removed some of the black casing (don't clip your
power or ground wires) and tapped into the power a little farther back for better
clearance during reassembly. Before tapping into your wiring harness you can
use your volt meter to confirm which wire has power (hot) and which is ground.
For unswitched power, blue was hot and black was ground. The V1 hard wire kit
has red as hot (fused) and black as ground.
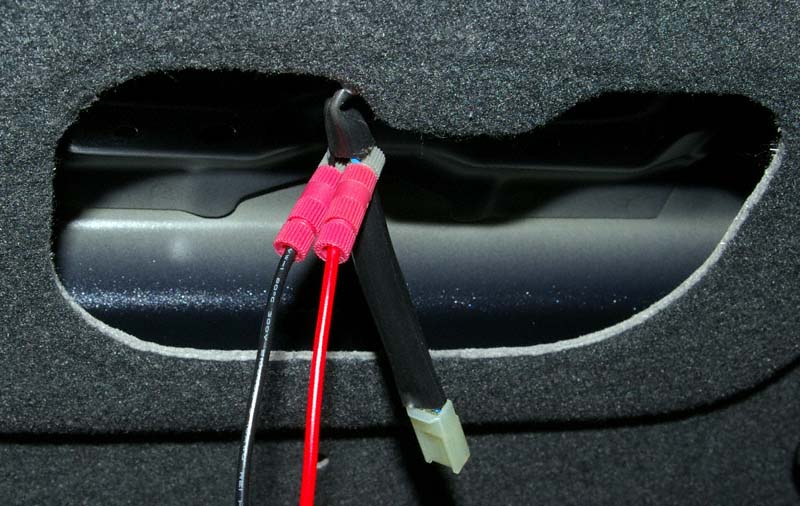
Subaru = Blue = Hot = Red = V1
Subaru = Black = Ground = Black = V1
You can test your installation
before reassembly by plugging the V1 data cable into the socket marked "main"
and then into the detector. This is an always-on power source so it should power
right away. If it doesn't power up, then check your wiring and confirm your
hot/ground. If it does power up, unplug everything and start final assembly.
I don't recommend this
installation. You have to turn the V1 on/off at it's control pannel; readjusting
the volume each time you need the detector.
Switched Power
(On/Off With The Ignition): Using the same Posi-Taps, you can choose
to use the power feed for the optional factory mirror (compass, HomeLink, etc.).
If you have the optional mirror, the connector should be as easy to find as
the connector for the map light is. If not, you'll have to reach way over to
the right to find it. It's tucked away in the head liner at about where the
right sun visor is. When you start to pull it over to the map light opening
it will seem as if it's too short to reach. It's not. If you gently pull, it
will eventually release from the adhesive that the factory used to keep it from
falling out of reach as the car is driven. That's not a concern when it attached
to the optional mirror (or to our V1/Posi-Tap tethers).
You can test your installation
before reassembly by plugging the V1 data cable into the socket marked "main"
and then into the detector. It shouldn't power up until the ignition key is
turned on. If it doesn't power up properly, then check your wiring and confirm
your hot/ground. If it does power up, unplug everything and start final assembly.
This is my prefered
installation. You can set the volume of the V1 and leave it; powering it on
and off with the ignition key.
For the switched power
option, Yellow-with-Green-Stripe is hot while Black remains as ground.
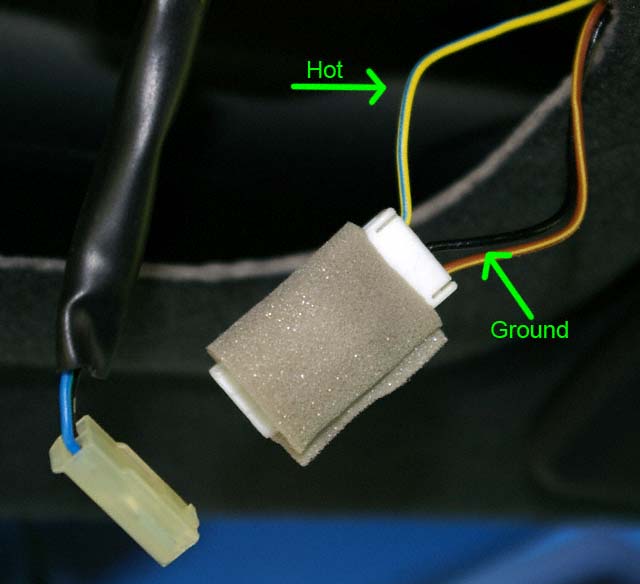
Subaru: Yellow-with-Green-Stripe
= Hot (power)/Black
= Ground
V1: Red = Hot (power)/Black
= Ground
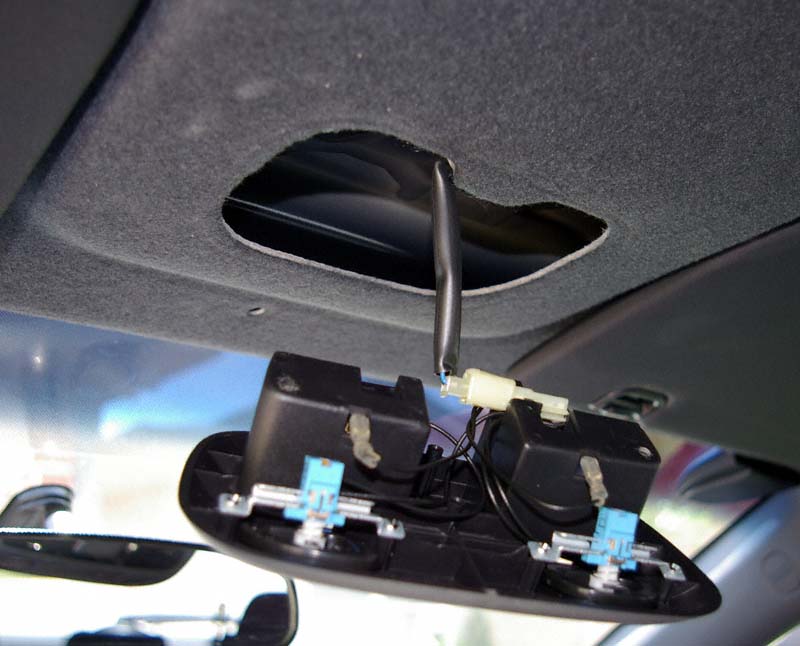
Unwrap a 6" section
of data cable on each end. Keep the data cable bundled as it was from Valentine
and secure it with the original twist tie. Feed one end between the head liner
and the windshield by carefully pulling the edge of the head liner away from
the roof/windshield. Leave enough wire for the data cable to reach the detector
when it's mounted. Run the other end of the data cable to the V1 hard wire socket
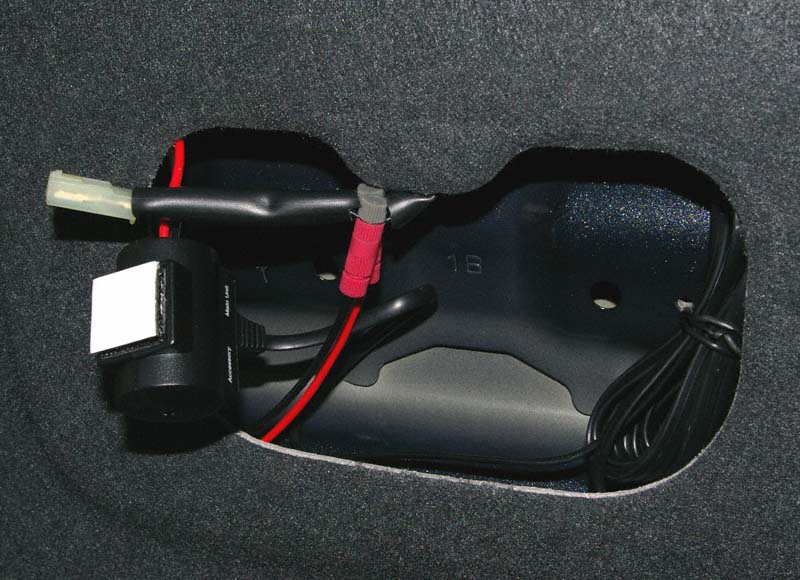
marked "main". I tucked the excess data cable up into the head liner
to the right of the map light assembly. I tucked the V1 hard wire socket to
the left. This puts the V1 socket in prime position for the future installation
of a remote display somewhere near the speedometer which will need another data
cable run down the driver's side pillar.
The V1 wiring is routed
above the map light wiring to minimize interference during installation of the
map light assembly.
Reverse the disassembly
instructions to reinstall the map light assembly. Test for proper function.
Enjoy!
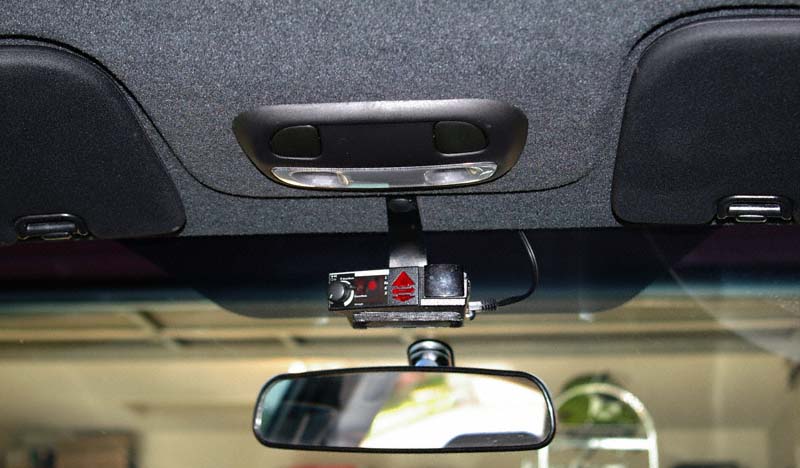
The sensors for the
front of the V1 peek out between the top of the mirror and the bottom of the
factory windshield tint and painted dots. Sensitivity should not be affected.
If your detector is too high and is blocked by the tint/dots, you can reshape
the metal arm of the bracket so it will hang down a little lower.
After running with the above set up for some years, I swapped out the DIY bracket for a porpose-built one by Blendmount. No more bouncy detector.
(C) 1995 - Present.
Mark Johnson. All rights reserved.