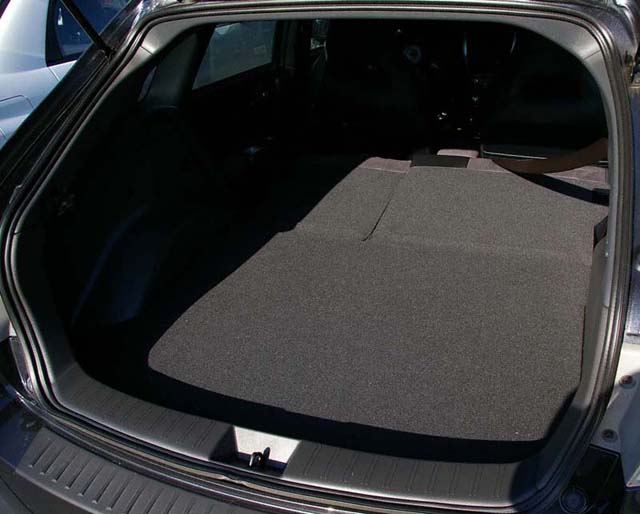
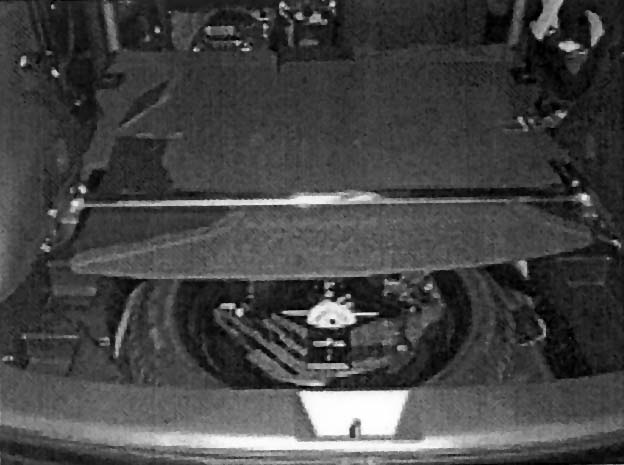
A view of the hatch before the installation of the Cusco rear strut brace
2008
Subaru WRX STi
Cusco Rear Strut Brace
Installation
Technically, the 2008 STi's rear suspension uses shocks instead of struts. For the sake of discussion, this article will refer to them as "struts"; in keeping with past rear strut braces.
Installing the Cusco rear strut brace is is a little more involved than installing the front brace. The instructions are also written in only Japanese. But the need to cut clearances into the floor for the left and right brackets increases the difficulty and throws a little metric conversion curve ball at you, too.
The Cusco rear strut brace kit includes the brace, 4 replacement nuts, and the instructions.
Before you begin, you'll want to line up the tools needed for the job.
| 8 mm allen wrench |
| 14 mm socket |
| 17 mm socket |
| ratchet handle |
| torque wrench |
| heavy card stock or cardboard |
| scissors |
| ruler or straight edge |
| tape (blue masking recommended) |
| jig saw or hack saw |
A view of the hatch before the installation of the Cusco rear strut brace
During the installation you'll want to work on only one strut tower at a time. Only loosen one set of nuts at a time, and do not put the car up on lifts, jacks, or anything else that lifts the tires off the ground. All of these precautions are to minimize changes to the alignment while working on the installation.
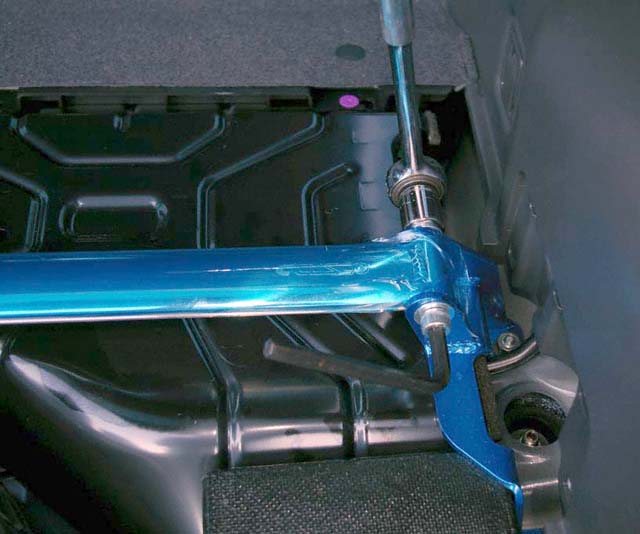
First, loosen the left and right hinges on the strut brace using the 17mm socket and the 8mm allen head wrench. You want to be able to move the brace around as you attach each side bracket to the car's strut towers.
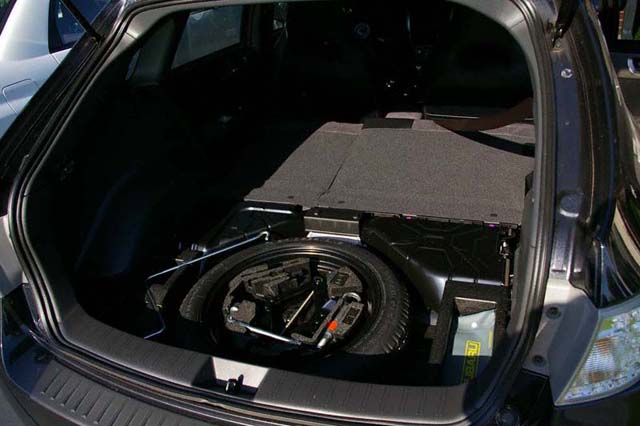
Next remove the hatch floor and set it aside.
Then remove the left and right panels from the wheel covering so that you'll have access to the tops of the strut towers. I found that working my finger tips under the edge of the panel and carefully working my way around the edges while pulling away from the wheel cover worked best without requiring any special tools. It also helped avoid scratching the plastic.
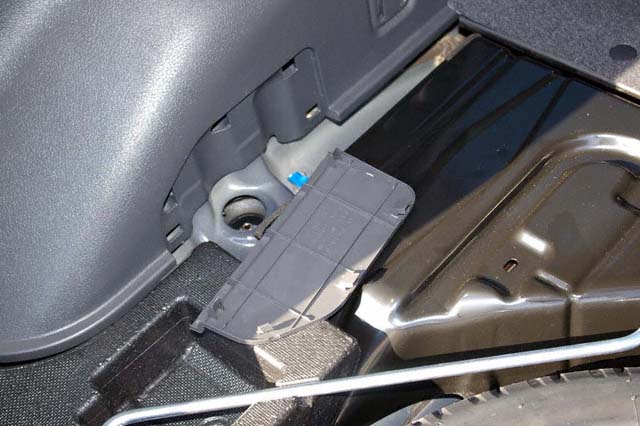
Left panel
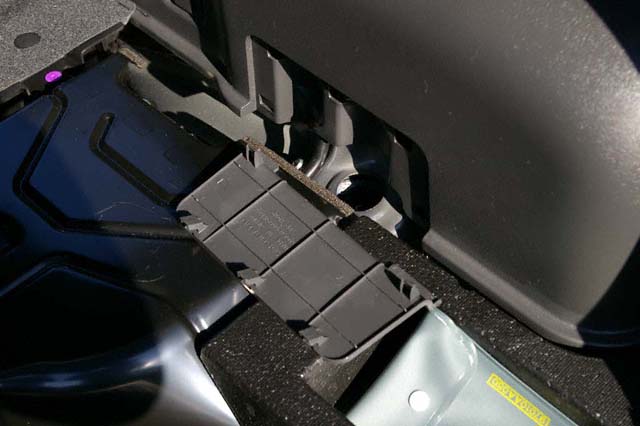
Right panel
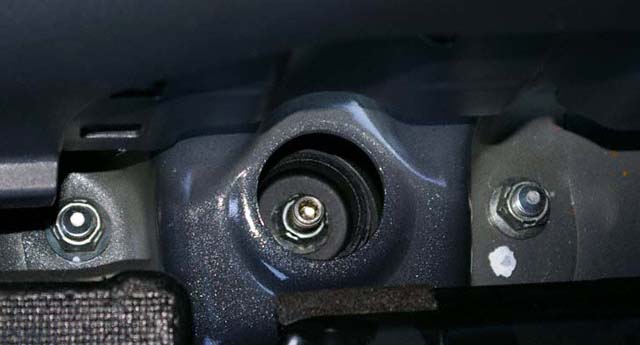
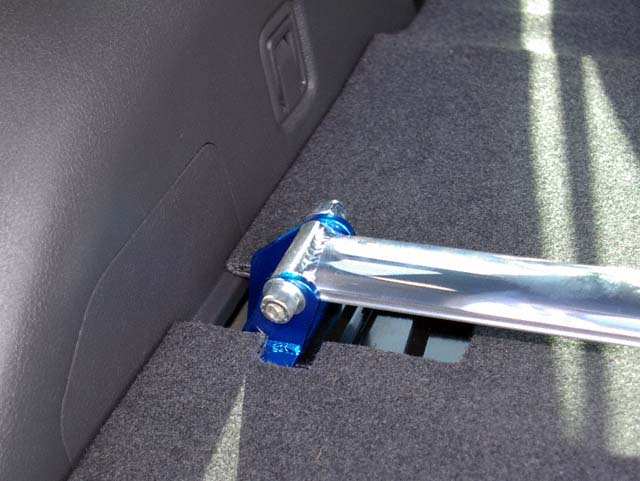
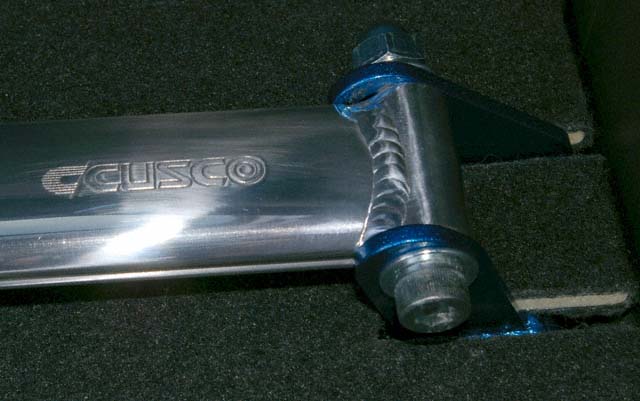
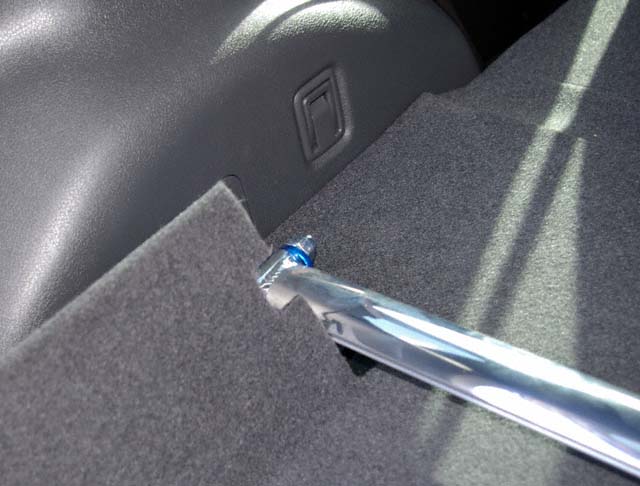
Next, remove one set (2) of the strut tower nuts using the 14mm socket. This photo shows a detailed shot of the left strut tower. Do not loosen or remove the center nut. The center nut is to the shock and remains tightly attached throughout the strut brace install.
Using the 2 nuts that came with the kit, mount the strut brace bracket to the strut tower; snugging them up but not tightening them to spec yet. Lay the other strut brace bracket over the top of the OEM nuts. Check for proper fit. Torque the first two nuts to 30 Nm (22.4 ft-lb) -- T1 below.
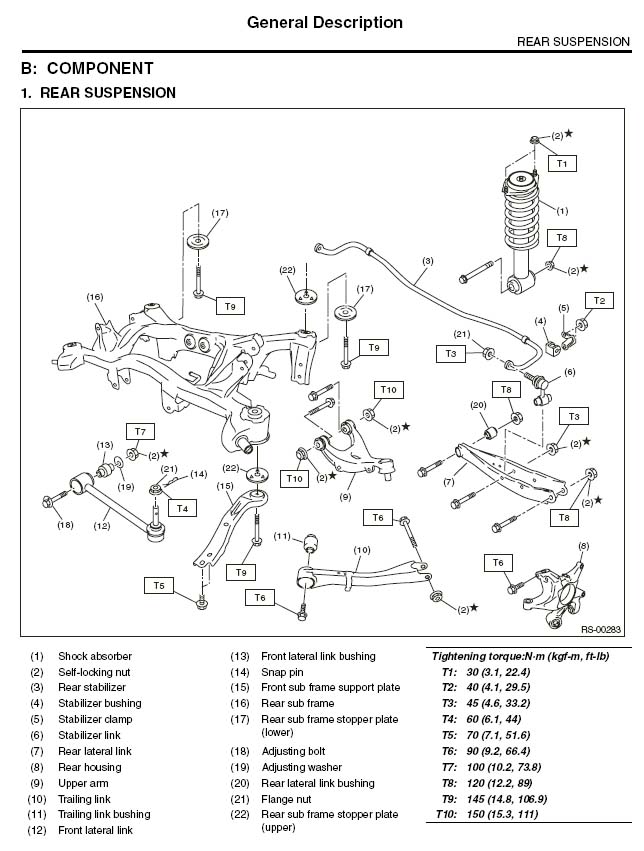
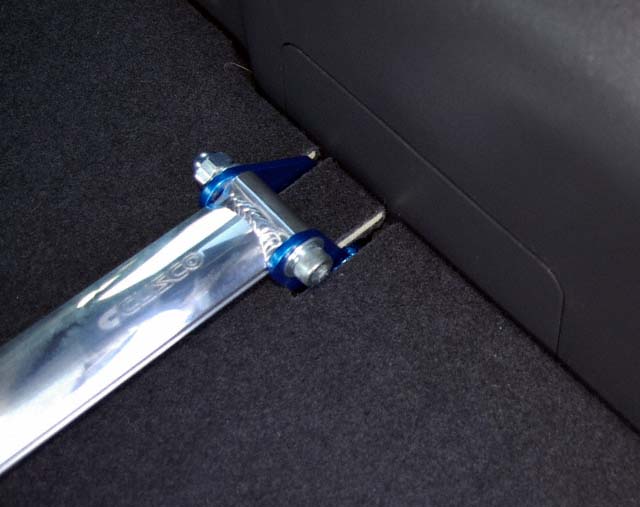
Repeat the process for the bracket on the other side. Again tonguing the remaining 2 nuts to 30 Nm (22.4 ft-lb).
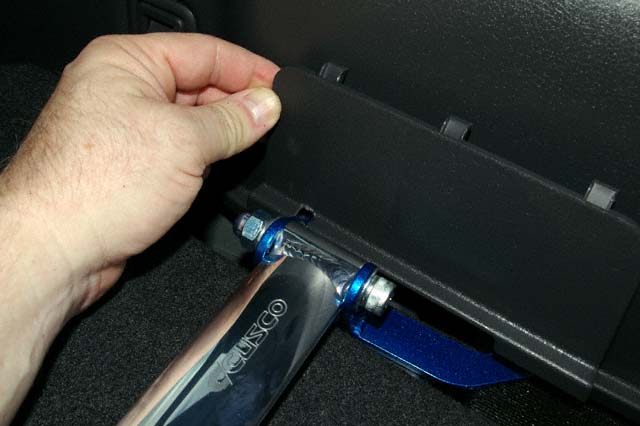
Double check clearances of the strut brace before using the 17mm socket and 8mm allen wrench to tighten the strut brace hinges. Tighten both until the lock washers are flush.
Peel off the blue protective film, remove the stickers near the left bracket and use your favorite cleaning products to polish things up.
Wait! We're not done yet. We still need to make mods to the floor so that it can clear the brackets.
The Cusco instructions came with a diagram of the 2 different cutouts that need to be done so that the floor panel can be slid back into place. Their measurements were in millimeters while my straight edge was in centimeters and my ruler was in inches and feet. Conversions are left to the reader with these 2 tips: MM/10=CM and MM=Inches
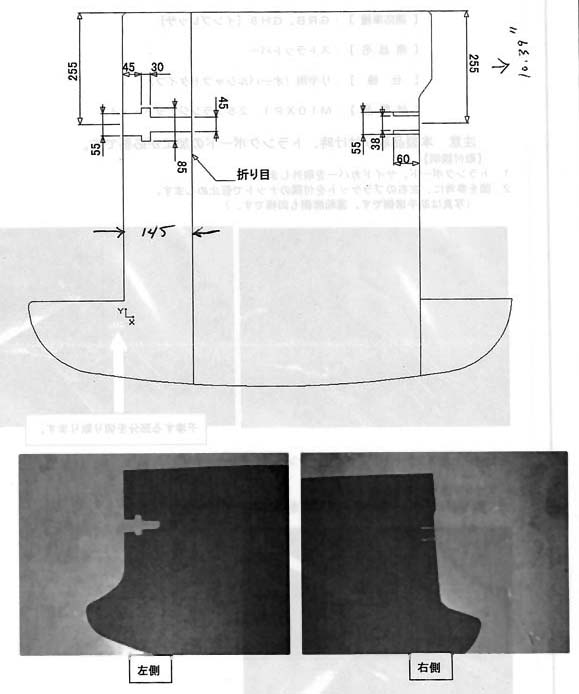
Cusco's instructions for cutting the notches in the floor
Some vendors' web pictures show the car reassembled with the 2 side panels left off. I was able to replace the left one with no modifications.
On the right panel I had to use a pair of diagonal cutters and remove a small area of the lower flange so that it would clear the left bracket. Re-install both panels before re-installing the flooring.
Instead of measuring and drawing directly onto the carpet, it was easier to create templates and tape them into place as guides while cutting.
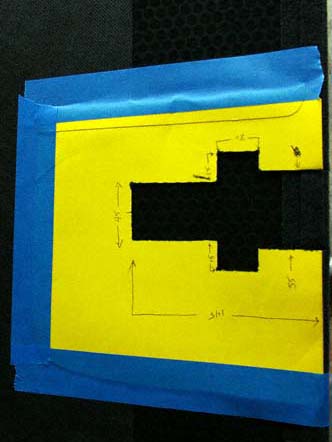
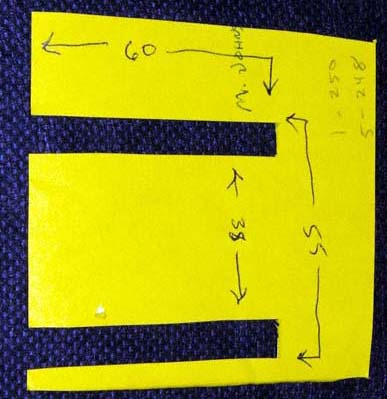
Left and Right patterns (measurements are in MM)
The right template is cut directly into the main flooring material which is tougher to cut than the stuff that's in the left "flap". The left is cut up to the foldable line of the "flap". The main material of the floor is a sandwich of materials that includes a plastic corrugated core with layers of metal (aluminum?) and plastic. I found that either a hack saw or jig saw helped in both cases. An exacto knife worked to clean up the work on the left "flap" but it was slow (and cautious) going on the tougher, right side.
Don't Forget Your Eye Protection When Hacking On Stuff
Once the notches are cut, reinstalling the floor is done from the front of the car. Lower both of the rear seat backs, fold the flaps on both sides up onto the top of the main floor area, slide the floor under the brace (from the front toward the back of the car), once the floor is aligned, slide it to the right so that the two channels slide around the right bracket of the brace, and then fold both of the left side flaps over and into place.
Cusco's photo of how to insert the modified floor
Right side notches slid around bracket (Nice welds!)
Left side "flap" dropping into place
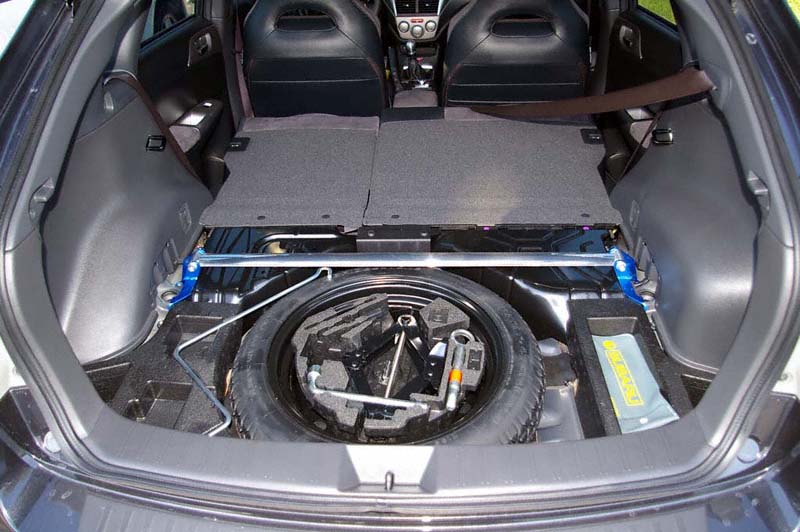
Last, but not least, step back and appreciate this well-made bit of kit.
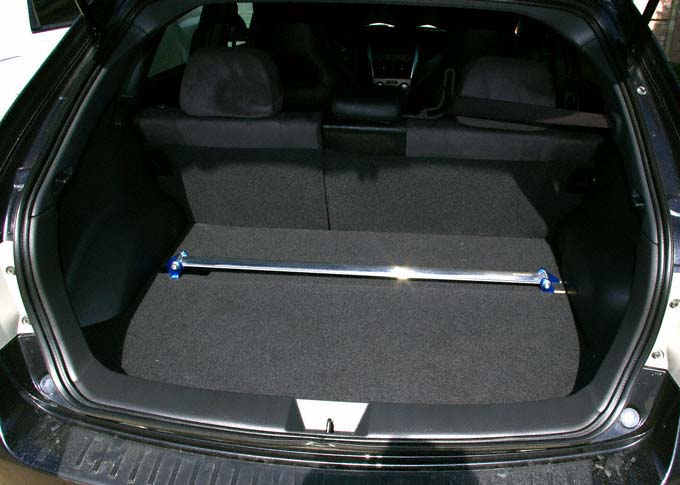
The brace is about 9" away from the backs of the rear seats. It's about 1" above the floor. I don't think it will be a problem for most items that will set on either side when packing. If there's a concern about the brace's finish, laying a towel over the brace will protect it. Larger items can be accommodated by laying rolled up towels (or similar things) as spacers (feet) to hold the item up enough to clear the brace.
(C) 1995 - Present, Mark Johnson. All rights reserved.